Showing posts with label From the Kitchen. Show all posts

Sunday, July 31, 2011

Eggplant -or- Why Does Baba ghanoush Have To Be So Ugly?

 If you're like most people, you don't really like eggplant.  That is unless it's breaded, fried, and covered with sauce and cheese.  I hear you.  It's weird.  It has a strange texture, color, and small when it's raw.  I wasn't a super fan of it growing up and didn't pay too much attention to it when I was an adult.  When I started getting buckets of it from my farm share, I figured I would try to find another way to eat it other than eggplant Parmesan.  By the way I use the recipe from the Joy of Cooking and it is wonderful. 

You can bread and fry the eggplant pieces and then freeze them.  Then all winter long you can pull out a slice here and there and put them on pizza, make eggplant parm or eat them with ranch dressing like my friend used to do when she was little...or not. 

However, if you've ever fried eggplant you know that it soaks up oil so effectively that I'm kind of surprised they didn't use it in the Gulf.  I don't really need to have that much breaded and fried stuff in my life so I ran a series of eggplant experiments.  First I made this really delicious dip with eggplant and butternut squash.  You actually make it in the slow cooker. It is really tasty but it doesn't freeze well.  So that was out. 

Then I started making Baba ganoush.  Seriously, this stuff is all gray and weird looking, but it is really yummy, but I expect that doesn't freeze too well either, so it's not really a preserving methods. 
This photo is from One Green Tomato.  I use her recipe, and I know what you're thinking, "that doesn't look ugly."  Well, she's a really skilled photographer, so don't be fooled, people don't want to eat gray food unless they already know it's delicious.
Then I came across a recipe in the book Preserving the Harvest for roasted eggplant and roasted red peepers layered with basil in an oil and vinegar garlic dressing. The first year I made twelve jars and thought, "What the Hell am I going to do with twelve jars of canned eggplant?"  I'll tell you what, eat the ever-living life out of it!! It is so good.  Even though it's made with vinegar it doesn't really taste pickled.  You can use them on sandwiches, pizza, salads, or chop it up or blend it in the food processor, spread it out in a shallow pie pan cover it with feta cheese and warm it up as a spread for pita chips or bread.  This stuff is incredible.  I gave a jar to my husband's grandfather for Christmas and he loved it.  I planned to make cases of it the following year (last year) but we didn't get a lot of eggplant, I'm not sure I got to make any.  This year I'm on it, though. 

Another thing I want to try my hand at is caponata.  Seeing as though this is a Sicilian dish and I am Sicilian by marriage I figured I ought to.  People say it freezes well, and I believe them.  It ca also be canned, and everyone seems to love this book for the recipe.  I'll let you know how it goes. 

Happy Eggplanting!

Wednesday, February 9, 2011

Veggie Pot Pie

 I used the last of my carrots in this recipe.  It is adapted from a recipe by my favorite vegan chefs, Isa Chandra Moskowitz and Terry Hope Romero.  The recipe is actually for a seitan pot pie, which sounds amazing, but my friend's daughter has a gluten sensitivity so our dinners are usually gluten-free.  I just decided not to replace it with anything but some of our turnips (which were incredible, by the way.  The variety was Gold Ball, we ordered them from Fedco). 

This is my adapted recipe, all gluten and dairy-free with a non vegan option, if that's sometimes your thing.  If you want the actual seitan recipe, I highly recommend the Veganomicon by the above authors.  It is my new favorite go-to cookbook.  This gem has politely and without violence to living things nudged The Joy of Cooking out of my number one spot. Sorry, Joy of Cooking!

Crust:
2 cups all-purpose gluten-free flour (or regular)
1/4 cup cornmeal
2 tsp sugar
1 tsp salt
1/2 tsp baking powder
1/2 cold vegan shortening
1/2-3/4 cold water
2 tsp apple cider vinegar

Filling:

3 tablespoons olive oil
1/4 cup all-purpose gluten-free flour (or regular)
1 large onion, diced
4 large carrots, diced
1/2 pound of potato (your choice here--I recommend red or Yukon gold) diced
Frozen greens, chopped small (or fresh) I used a package from our freezer that I had helpfully labeled "Kale, about a bunch"
1/2 pound turnips, diced
1 stalk celery, diced
1 cup small sweet peas or corn kernels (I have only had these on hand once and have left the out the other times I've made this and it doesn't suffer too much).  
2/3 cups white wine or vegetable broth
1 1/2 vegetable broth
1 tsp thyme
1 tsp mustard powder
1/2 tsp ground sage.
salt and pepper to taste
*another note here, I have found that using Bell's Seasoning in this is amazing.  It's some sort of blend of sage, rosemary, thyme and maybe oregano...anyway, it's what we New Engenders use to make stuffing magic.  It works in this. Use 1 1/2 tsp.  I also put it in veggie burger recipes to give it a meat-like remembrance).
*one more--I have also added cooked turkey to this, I just mix it in at the end before I pour it into the casserole dish.  It may make the gravy too thin, so I just add about a 1/4-1/2 cup cold water mied with a couple tablespoons of cornstarch. 


Makin' The Crust

Combine flour, cornmeal, sugar, salt and baking powder in a large mixing bowl.  Add the shortening in small chunks and cut into the flour with knives, a pastry cutter, or forks. Mixture should look like crumbs.

Pour 3/4 cup of the cold water into a bowl with a few ice cubes in it.  Measure out 1/2 a cup and stir the apple cider vinegar into it.  Add the Vinegar water to the dough in a few batches, mixing gently until it holds together when pinched.  Add more, if needed, a tablespoon at a time.

Gently press together into a ball and roll it out on a piece of parchment paper into a similar shape and size as the dish you will be using for your pie (I use a 9 1/2 x 11 x 2 inch Pyrex casserole dish). Slide it onto a cutting board and put some parchment over top.  Place it in your fridge until you need it. 

Preheat oven to 375

For the Filling:

Heat a soup pot over medium heat and add 3 Tbsp of oil and stir in the flour. Stir frequently and toast the flour for about 10 min.  Stir in the onion cook for 4 minutes, add the carrot, potato, turnip, and celery.  Cook for about 8 minutes, stirring frequently.
Pour the wine or broth, stirring to bring up the brown bits on the bottom of the pan.  Cook for about 2 minutes to reduce a bit then stir in the peas, corn, frozen greens, extra zucchini, whatever you have lying around.  Pour in about half of the broth add spices.  Bring mixture to a simmer.  Stir in the remaining broth and bring to a simmer again.  Cook for another 10 minutes until a thin gravy has formed and the potatoes are nearly cooked.  Remove form heat, season with salt and pepper, and pour it into a casserole dish.  Top with the crust, pressing down the edges a little.  Place in the preheated oven and bake for about 45 minutes until bubbly and the crust is browned.

Let cool 10 min before serving.

This thing is pretty good, let me tell you.

Wednesday, November 10, 2010

Beanballs...

I know.  I wish it had a better name too.  But they are so, so good and I'd like to share them with you.
We are not vegans, but since we are a dairy-free family who tries to eat meat only one to two times a week I find myself turning to vegan cook books quite often.  My favorite vegan chef by far is Isa Chandra Moskowitz, and my favorite book of hers (so far) is The Veganomicaon, and Vegan Cupcakes Take Over The World, and Vegan Cookies Invade your Cookie Jar.  She is something of a vegan magician when it comes to deserts.  Nothing is dense and chewy (when it's not supposed to be) and she even has a recipe for frosting that tastes just like frosting! It's a good feeling to watch someone devour a cookie and tell you it's great and then you get to say, "It's vegan!"

The thing I love about the Veganomicon is that she uses real food.  There isn't a lot of fake, factory made "cheeze" or even an abundance of tofu.  The recipes are all made with food, which means a lot to me because I've gotten basically all the food that isn't really out of my life and I'd hate to backslide now.  Don't get me wrong, in order to make that amazing frosting you do need some earth balance or some other vegan margarine, but hey, it's a cupcake, you know?  The other thing about this gigantic cookbook is that it's really funny.  It's like the joy of cooking with a couple of glasses of wine and no animal carving how-to's.  Anyway, I highly recommend it. 

However, I rarely follow a recipe exactly, and this is a version of the recipe she has in this book. It's gluten free and I actually think they have a nicer texture than the ones that have wheat gluten and bread crumbs in it.  They stand up a little better to sauce and reheating. I haven't experimented with adding veggies but I'll make them again in another couple of weeks and I'll give it a try.  They are perfect transports for hidden (frozen) kale.


Beanballs:

Ingredients:
1 (20 ounce) can kidney beans rinsed and drained (about three cups)
2 Tablespoons soy sauce
2 Tablespoons steak sauce
2 Tablespoons Olive oil (plus some for baking)
2 cloves garlic grated or minced finely
1/4 teaspoon grated lemon zest (I have never had a lemon handy so I've always left this out)
1/4 cup potato starch flour
1/4 cup corn flour
1/2 teaspoon dried thyme
1/4 teaspoon dried oregano

Preheat oven to 375

Mash up the beans with a potato masher and get the stubborn renegades with a  fork. It shouldn't be smooth, you should know that they are made with kidney beans, but no whole ones left.  Add soy sauce, steak sauce, olive oil, garlic, lemon zest potato starch, and corn flour. Use a fork to mix everything together until it well combined and firm. 
Roll the mixture into walnut sized balls (about 12-15) but don't make them too being, smaller is better for texture.  Place them on an oiled cookie sheet and drizzles or brush them with additional oil.  Bake them for 15 minutes, then flip brush with more oil and bake for another 10.  Add them to warm sauce and serve. 

I served them with broccoli polenta, and the sauce I canned this summer.  The polenta went over so-so with the little ones but the bean balls were a hit for dinner and for lunch the next day too!

Wednesday, October 6, 2010

Herbal Medicines and Trips to Western Massachusetts

When swine flu hysteria started making my world feel like Salem, Massachusetts 1692 style, I did two things.  I stopped listening to the news and I decided not to give myself or my family the vaccine.  I wouldn't put myself in the category of vaccine-fearing-government-conspiracy-believing-wacko, but I am wary about them, especially when there are signs everywhere shouting: "Vaccinate NOW!" "Get your free vaccine here!"  "If you vaccinated here, you would be home by now," I mean, that doesn't even make sense.  The news was just wiggin' me out and I didn't want to put my carefully reserved positive energy into worrying about the pig flu. 
I'm a big fan of protecting yourself by eating dirt.  What I mean by that is my kids get dirty. Despite evidence to the contrary, we don't actually eat dirt. But, we don't use hand sanitizer, we wash our hands but not obsessively, we play with other kids and sometimes those kid sneeze....in our direction.  All that said, I had already been partially poisoned by the news I was listening to before I quit the junk.  So, I was freaked out.  Freaked out enough to imagine the system shutting down and needing to dig up Day Lilly tubers and heat them over a fire made from my dining room chairs.  I thought if I was going to make the "crazy" decision not to vaccinate I should have some knowledge of what I would be in for were we to sweat out the flu. 

When I was a kid my mom got into natural remedies.  When we got sick there was always a piping hot mug of something bitter and sluggish to choke down (sorry mom), which we would do, dutifully.  To my recollection, we were always cured right up.  I didn't inherit this knowledge from her, but it did foster in me a love and interest in herbal medicine.  It gives me a real witchy feeling and makes me feel like a natural woman, makes me want to wear a hooded cape and carry a basket instead of a courier bag.  ...Anyway, I have a couple of medicinal wild plants field guides, and along with my wild edible forays, I have picked up some info about what I could use out there in the woods for various aliments.  I am forever running out to the yard to grab some plantain for a poultice, but I wanted to know more.  I wanted to know enough to feel comfortable keeping my kid away from the doctor's office were she to have a fairly high  fever.

I stumbled across this website.  Tony(a) Lemos runs Blazing Star Herbal School in western Massachusetts and was offering a workshop called "No Fear Flu." How's that for a made-to-order gift from the Universe? It's quite a hike from where I am, about a three hour drive. But as many of you mommas out there can imagine, a trip to beautiful western MA in the fall, with no kids in the car, a scarf, a warm mug of tea, and some historical fiction on cd is something of a beautiful nerdy mini-vacation.  When I got there, I quickly realized that I was by far the least knowledgeable person in the room.  It seemed like the class was full of people who (all knew each other) and who had been practicing either professionally or for a long time.  This was great news because I was bound to learn a lot, especially if I could get over a childhood fear of "asking stupid questions."

Tony(a) covered a lot of material, and I'm no herbalist, so I won't be giving any medical advice.  But I will say this, she made me feel really comfortable, and not crazy, with my decision to deal with potential sickness at home with plants. I guess that's no surprise given what she does for a living, but I am a New Englander and skepticism lives close to my heart, despite my fairy-loving beliefs.  It was really down to earth with great advice.  Like what?

Get Sleep.  Get as Much sleep as your body needs.  Not just when you're already sick, that's how you keep from getting sick in the first place!  If you are going to get sick, you'll get sick when you are tired and your body is not getting a chance to repair itself when you're resting.


Take a hot bath.  Like  98 degrees.  Keep your kids in a bath over 98 degrees for over 20 minutes and it will kill the flu virus.  So, if you're out an about and someone wipes their nose and shakes your hand (or kids do this or something even grosser) take them home and plunk them in the bath.  They will complain, I can tell you, just read them a story or something, try to keep them in there for as close to 20 minutes as possible, and try not to giggle at their super red bums.  That's pretty easy, isn't it?  My older girl got in the habit of saying to the little one, "Hunter, it's hot for your health!"

Eat well. This is pretty straightforward, but it's easy to forget. Your body works only as well as the fuel it runs on, you know?

I also learned some other things like:


Don't suppress a fever up to 103 degrees.  This is a healthy fever.  It's doing its job, cooking out the virus, let it be.  If the fever rises above that gently reduce it using lukewarm water and wiping the patient (a.k.a. whimpering child) with a rag. No ice, this can cause shock.  I asked how long would you keep your feverish kid feverish before you started to worry about...what?...brain damage?  I mean, I don't know about you, but I have loads of cultural images in my head from my full childhood of TV watching that tells me that fever=insane person in like, 2-4 hours.  She said she would be pretty comfortable with a fever of 103-104 for three to four days.  (Let me just say here that I am not offering medical advice here, I'm just a lady who believes the herbalist and would wait out a fever for a few days.  You should do whatever makes you comfortable...just so we're on the same page.)  I also know that a little peppermint essential oil on the bottom of a kid's feet will drop a fever, as will wool rags soaked in vinegar or lemon justice and applied to the calves.

Stimulate a low grade fever.  A prolonged low-grade fever is something more to worry about and it might be helpful to stimulate the fever with a little cyan to induce sweating and get the circulation going. 


When the fever is broken eat protein.  Scrambled eggs are a good choice.

I also learned a few great recipes, some of which have become staples for my family.   One of which is FIRE CIDER!  I imagine this being advertised 1800's style with slogans like , "Dr. Stinky's Fire Cider! Impress your friends! Made from roots that come from the center of the earth!  Breath fire! Grow hair on your chest! Keep the common cold at bay."  Fire cider is an immune strengthener, you make this tonic and take a table spoon a day.  Although, over here we like to down a shot glass every morning.  Then we beat our chests and growl a little.  It makes us feel like animals with super immune systems. 
 

Fire Cider:

Fill a quart mason jar 1/3 full equal parts peeled and chopped:
ginger root
horseradish root
garlic
burdock root
pinch of cyan

then 7/8thfull of apple cider vinegar and 1/8th full raw honey.

You should let it sit for about a week and then use it until it runs out.  You can cook the roots with some chicken once you've finished the cider. 

Another standby in our house (just administered to the wee one this morning after)  is sage honey.  Sage is an antiviral, antibacterial, anti fungal.  Taken internally, it will fight infection.  Honey is awesome.  I made a big 'ol jar of it this year.
Fill a jar with chopped fresh sage leaves.  
 
Pour (preferably raw, local) honey over the leaves about 7/8th full. Mix it around as much as you can to get the honey over and through the leaves.  Pour in more honey.
 
 Fill 1/8th with brandy.  This helps it mix a little better and pulls more of the sage-y goodness out of the leaves and into the honey.  If you are doing a double take and reading back to make sure you read what you thought you read, yes I do give this to my children.  When administered in tablespoon doses, there is more alcohol in an over-ripe banana than there is in this medicine.  Probably.
 It is also a great addition to a warm tea when you or your youngsters are feeling sick. 

The same concoction can also be made with thyme.  I believe I was told that sage is more for lower respiratory congestion, while thyme is more upper-respiratory. 
I will be sharing more of our herbal experiments, but these are great stapes to start with.
And don't forget to eat some dirt.

Wednesday, September 22, 2010

Egg Pizza (commonly referred to as frittata)

We don't have a lot of quick meal possibilities here.  In my effort to create and consume meals made with food, I have somehow exiled all dinners that can be ready in under a half and hour.  This would be fine with a little forethought, but, alas, there is precious lack of that in the summer days. The summer, with its overabundance of fresh food finds me cowering in my kitchen at 4:45 wondering how I can possibly turning all this raw food into dinner in 15 minutes!  Last year it was even worse.  In my exuberance to preserve food for the winter, I would accidentally process all the food and my kids would have to eat mac 'n cheese. 

Now the problem is more that all my food is frozen or dried.  Or still flour.  I buy all my beans dried, which mean they're at least 45 minutes away from being food (with the help of a pressure cooker), or three days away from being food the old fashioned way.  Rice, same--40 minutes. Polenta's a good quick meal...but with what?! I was even given an electric pasta maker and so it's pretty easy to make pasta, but at 4:45, it doesn't seem easy, and again...with what?  I know I could just have some of these "prepared" foods on hand in case of emergencies...but 4:45 happens everyday!  And it's always an emergency.  When I am at the store I think, "I should just buy a can of black beans," and then I'm all, "No! I should get better at making sure I have beans soaking!"  In the end the only ones who suffer are my mal-nourished children, getting scurvy among all this fresh produce. 

Enter "Egg Pizza."  This dish was recently anointed with this creative name by my daughter.  It's really just a frittata.  This has been a staple meal for us for a long time, but it has reached a new status since there is nothing else here a frazzled mom can make in a jiffy (besides peanut butter and jelly--but sometimes my bread is still flour).  My oldest really loves this meal even though she recently started truing down eggs at breakfast time. She says she doesn't like them.  Add potatoes and serve in a triangle wedge and everyone's happy.  The greatest thing is it seems I can fill it with whatever vegetable I want and she will eat it all! She can practically (no, really she can) polish of an entire 8" skillet by herself.  Chard, spinach, green beans, zucchini...whatever there is I throw it in there and it's gone in a minute.  Of course if there aren't potatoes in it the other ingredients get looked at with a bit more scrutiny, but not much. 
Once upon a time, I used to do the "Cook One A Month" thing and had all my meals planned out in typed-up calendars, in the freezer and ready to go.  I haven't been able to do that since I had my second daughter was born.  I made three months worth of meals before she was born. Just when I thought I had the hang of this two kids thing, I realized that I hadn't had to actually cook dinner yet and panicked a little.  Clearly, I haven't fully recovered.

"Egg Pizza for dinner again!"

I will be planning at least a week in advance for the winter, and I will hopefully be sharing that plan here. 

But for now, I trust in the glory and quickness of the Egg Pizza!
Directions:

Heat 1-3 Tbsp olive oil in a cast iron skillet.
Saute potatoes until browned and the veggies, onions (whatever you like) until soft. 
Beat together 6 eggs 
Pour over veggies.
Cook on low for about 5 minutes or until edges look cooked. 
Place in the oven on low broil until the top is slightly browned (about 5 minutes).
Take out and let cool slightly, slice and serve.  This is good hot or cold. 

Of course this dish becomes magical with the addition of any kind of cheese.  We are mostly dairy free over here but feel free to add about a 1/2 cup of whatever makes you smile.

Friday, September 17, 2010

The Best Tomato Soup IN THE WORLD!

Well, I haven't had all the tomato soup so maybe I can't know for sure, but this soup is pretty awesome and we have eaten a whole mess load of it in the past month.  I got the inspiration for it here. But we are pretty much dairy-free over here so I had to tweak the recipe a bit. 
Ingredients:

About 6 pounds of tomatoes (any tomato will work, but Roma tomatoes will have more meat in them and give you a slightly thicker soup)
3 Tablespoons of olive oil
1 large onion
4 cloves of garlic (more or less to taste)
4 large carrots
1 cup cashew cream* (or heavy cream, or light cream)
salt, pepper, herbs such as oregano, basil, thyme, or whatever you like.  I just put in an ice cube of pesto from the freezer

Preheat oven to 400 degrees. 
Cut tomatoes in half, trim the stem end and place them on a baking sheet lined with parchment paper cut side down.  Don't worry about peeling them, when they're done roasting the skins will slip right off.  Roast for 30 minutes.  Let cool slightly so you can handle the skins without damaging yourself.  Pull off the skins.

Heat the olive oil in a soup pot and saute onion and garlic until soft.  Add carrots. Add tomatoes.  cook on a low simmer until carrots are soft. 

Alternately you can skip all the steps after roasting the tomatoes and throw everything in the crock pot and cook on low for 2-4 hours until the carrots are tender.

Use an immersion blender or a blender in batches to puree the soup. 

Stop here if you'd like to freeze the soup.

Add cashew cream (or the cream you're using) and drop in your frozen pesto, if using.  Heat the soup back up slowly.  If you use real cream make extra sure not to let it boil. 

Yay!

Cashew Cream?

Cashew cream is the best thing in the whole world if you avoid dairy and even if you don't!  I have used it in this soup and in a corn chowder and neither of the soups have that, "this should be cream, but clearly we're dealing with hippies with some sort of dairy-free notion and they refuse to use the good stuff" taste.  Really, it adds something magical to soups.  You make it using raw cashews , which don't have the strong flavor of cashews you're thinking about.  It's thick and creamy and gives the soup a deep flavor. 

This is how you make it:
Measure 2 cups raw whole cashews (pieces tend to dry out) and cover in cool water.  Put bowl in the fridge over night.  Drain the water and put the cashews in a blender and cover with water (about an inch over the cashews).   Blend it until it's smooth.  I have heard the suggestion to strain it if there are any tiny pieces in it your blender couldn't take care of, but I never had that issue and my blender wasn't the best.  Try it!  It's sooo good!

Thursday, August 26, 2010

Tomatoes

If August were a woman she would be draped in red, with long red hair, and a fiery temper.  I'm pretty sure she just stormed into my house dumped a bunch of tomatoes and zucchini on my kitchen floor, looked at me lovingly, and, just as I was getting used to having her around, said she was about ready to leave.  Sigh.  That is the way of passionate love affairs, I guess.  When it goes that way, you can usually console your self with a zip-up hoodie your fiery-tempered lover has left behind in their haste.  In this way August's leaving me is similar.  She is leaving her bounty for me to savor while she slips out the door and the slow, cool comfort of Autumn takes her place. 
Last year, with the blight, there was scarcely a tomato around.  I bought a box of sauce tomatoes from a local farm and made a batch of ketchup that wasn't very good.  Well, it was good, but it wasn't ketchup.  If you thought of it as tomato spread, or something like that it was alright. But if you sat there with your french fry and thought, "I can't wait to have some ketchup," you would find yourself disappointed.  The spices were too strong and all wrong.    It did, however, make a mean BBQ Sauce. 

This year there are tomatoes! It is very exciting. So far, I have preserved them by:

1. Roasting and Freezing:  Set your oven to 200 degrees, cut Tomatoes in half and line a baking sheet with parchment paper, and place tomatoes on the sheet cut side down.  Roast for 2 hours.  When they come out of the oven, let them cool so you can touch them.  The skins with just slip right off.  Pack a mason jar 2/3 full only! (the jar will crack in the freezer if it's more than that), and pop it in the freezer.  These can be used later for sauce or soup.  The roasting makes the flavor absolutely incredible. 

2. "Sun Dry" (dehydrate):  I sliced the big tomatoes into thirds and dehydrated them in my electric dehydrator for about a day.  The plum tomatoes I sliced in half and dehydrated them for longer.  The manual says it shouldn't take this long, but that's how long it took.  I am still having trouble finding the right consistency.  I know they should be leathery, but when they are they still seem wet, and I don't want them to mold.   So the truth is some of them are a little crisper than usual.  I'll have to soften them in water before I use them.  I have also dehydrated the cherry tomatoes. We had an abundance, and I couldn't figure out what to do with them.  We sliced them in half and dehydrated them (they are doing this right now) and I will pack them in olive oil in jelly jars. 

3. Tomato Jam:  What's tomato jam?  I don't really know.  It seems like it's similar to ketchup bu not as thick.  My two-and-a-half-year-old says, "I yike dis tomato jam, Mama."  I took the recipe from The Big Book Preserving the Harvest. 

4. Tomato Sauce:  This recipe I took from Ball Complete Book of Home Preserving.  It is a water bath recipe, which means that it doesn't have to be pressure canned.  It has lemon juice added to boost the acidity so we don't get botulism.  I also boiled the ever-living life out of that stuff.  So hopefully we won't all die from a home cooked spaghetti dinner. 

I am hoping to make some salsa, some real ketchup, and some more tomato sauce.  I don't really have enough right now to make it through winter.  I think more than likely I will be spending the weekend gathering sauce tomatoes and canning.  Which is fine, really.  Now that the summer is coming to an end, my panicky feelings that it won't be enough are (mostly) turning into contended feelings of having done the best I could.  And after last year, I'm grateful for any tomatoes.

Tuesday, August 10, 2010

Toothpaste


I am on a mission to reduce my consumption.  I have tightened the screws, and as supplies run out, I am looking for less wasteful or reusable ways to replace them.  I have been patiently waiting for the toothpaste to run out completely to motivate me to try out some recipes. 

When I began my inquires to the Internet about how to make toothpaste, I came across a few interesting things.  One was the information that toothpaste usually has aspartame in it.  This is apparently what make toothpaste so sweet.  I am a little embarrassed to say that I had never even thought about toothpaste being sweet, let alone what makes it that way.  Needless to say, I'm glad we won't be having any more of that before breakfast.  Another ingredient in commercial toothpaste is glycerin.  This is also makes it sweet and it gives toothpaste its pasty consistency.  Many natural recipes also use vegetable glycerin.  I had to look up glycerin to find out what it actually is.  I do have some I got at the pharmacy because it is needed in the task of making snow globes (it helps suspend the glitter flakes in the water, making their decent delightfully slower).  I found that "Glycerin is a thick liquid that is colorless and sweet tasting. It has a high boiling point and freezes to a paste. Glycerin's most common use is in soap and other beauty products like lotions, though it is also used, in the form of nitroglycerin, to create dynamite." Oh. Wait, what?!  

So, I read more.  Basically, glycerin is a chemical that is derived from the soap making process.  It comes from fats which can be vegetable or animal.  It's sweet, syrupy, and pulls moisture to itself, which is why it is used in a lot of lotions.  Now, without making my degree in fine arts and not in science painfully clear, I will try to explain why it is controversial.  I read some information that suggests the reason why it hydrates the skin so well is because it is actually pulling the moisture from your own skin's deeper layers, drying your body from the inside out.  It also is a dubious toothpaste ingredient because it appears to leave a film on the teeth for days, preventing remineralization of the teeth.  

When in doubt--Leave it out.  So I did.  

Don't even get me started on fluoride.  Seriously, I don't want you to think I really belong on a compound in Montana with a sniper rifle strapped to my back.  But, "The fluoride added to 90% of drinking water is hydrofluoric acid which is a compound of fluorine that is a chemical byproduct of aluminum, steel, cement, phosphate, and nuclear weapons manufacturing.  Such fluoride is man made. In this form, fluoride has no nutrient value whatsoever. It is one of the most caustic of industrial chemicals. Fluoride is the active toxin in rat poisons and cockroach powder.  Hydrofluoric acid is used to refine high octane gasoline, to make fluorocarbons and chlorofluorocarbons for freezers and air conditioners, and to manufacture computer screens, fluorescent light bulbs, semiconductors, plastics, herbicides, -- and toothpaste."  I don't want fluoride in my toothpaste either.  

So what did I do instead?  I made m'self some toothpaste out of coconut oil, baking soda, peppermint essential oil, and stevia.  
See? This stuff comes from the kitchen.
Why these things?  Well, apparently we don't need much more than flossing, gentle brushing and a mild plaque-sanding abrasive to keep our teeth healthy (not to mention plenty of dark, leafy greens filled with calcium).  The baking soda is the abrasive, the stevia is to make it a little sweeter (it's a plant extract you can use as a calorie-free sugar substitute), the peppermint is to freshen your breath and hide the unpleasant taste of baking soda, and the coconut oil is to make it pasty.  I saw a lot of recipes that included things like hydrogen peroxide and tea tree oil.  These ingredients would be added to kill bacteria, but that's a little too much chemical for me.  Tea tree essential oil is natural and everything, but it's pretty serious.  I was thinking of adding a little bit of sage tincture to the toothpaste, but I ended up just adding it to my mouthwash instead.  Sage in an anti-viral and had been used to treat gingivitis, so I figured I was in good shape to use this.  
But back to the toothpaste.  First I used equal parts coconut oil and baking soda (2 Tablespoons each):

Then I added 1 more tablespoon of  baking soda:
Then a little more....
Then one more.
In the end I used 2 tablespoons coconut oil to 4 tablespoons baking soda.

Then I added 35 drops of stevia to the mix.  Stevia has a sweetness equivalent that is something like 2 drops stevia to 1 tsp sugar.  it's pretty sweet, but it has nothing in it to rot your teeth, add pounds or cause cancer in lab rats in the state of California.  After that I added about 10 drops peppermint oil.  Both of these ingredients are about personal taste. 

It came out pretty good.  My oldest daughter loves it, my youngest, not so much.  But they both use it.  We have been using it for maybe a month now, no problems.  Except the dispensing. I tried to get a small squeeze bottle but it didn't work.  Someone somewhere on the Internet had the idea of taking an empty toothpaste tube, cutting off the end, filling it that way and using one of those toothpaste pushers to seal the end.  This seems fairly brilliant and I plan to try it out just as soon as I get my hands on one of those things and an empty toothpaste tube.  For now we just kind of scoop a little bit out of an amber glass jar.  Not ideal, but it works.  


This is my final recipe:


2 Tbsp Coconut oil
4 Tbsp Baking Soda
35 Drops Stevia Extract
10 Drops Peppermint Essential Oil


Mix.  Brush.  Feel Free. 

Wednesday, July 28, 2010

Simple Summer Squash Sauce

My family has quit eating dairy for a number of reasons.  It gives my oldest daughter and myself a stuffy nose, makes us cranky, and is one of the very few foods we had to actually go to the grocery store for at this point.  We figured by cutting it out we might enjoy better health and have one less thing to rely on The Man for.  We are in the midst of a 30-day clean out, and I have seen real changes in my oldest daughter's behavior.  It's really amazing.  I had realized I was sensitive to dairy after Christmas when the cheese was free flowing and I finally couldn't breath at all.  I thought I'd give quitting dairy a shot and cleaned out my body for 30 days and felt a world of difference.  When I asked my husband if he noticed any difference in me, he avoided eye contact and said "Yes..."
"What is it?"  I prodded, assuming he was just having trouble putting into words the amazing change in my now glowing complexion.
"You're, well..you're nicer."
"What do you mean by that!" I asked (very nicely).

So that's how I learned that dairy gives me a stuffy nose, and possibly makes me cranky. 

This has changed our menu quite a bit.  We don't eat a lot of meat and relied pretty heavily on the creamy, protein-filled goodness of cheese, whole milk and butter.   It's proving to be a bit of a learning curve in the kitchen.  One thing I have noticed recently is that my older girl especially is always hungry. I think she's suffering from a lack of fat in her diet.  I'm trying to step up the fat content of our dinners.  This dish is not an example of that, but I did manage to make a fairly "creamy" sauce for our homemade whole wheat egg noodles. 

Summer Squash sauce

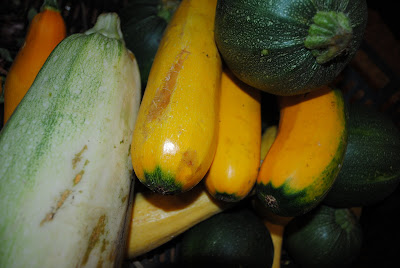
3 Summer Squash  (I used the deep golden summer squash, not zucchini or crookneck.  Either of these could be substituted, but they just won't give the same color.)
1 medium onion
olive oil
2 Tablespoons cornstarch
1/4 cup cool water
1/4 tsp nutmeg
salt and pepper to taste.


Slice up the squash and steam until tender.  While that's steaming, dice the onion and saute in the oil until tender. Puree the squash and add to the skillet with the onions. (You could puree the onions with the squash if you have picky eaters who will let their dinner get ice cold while they carefully pick out all the onion pieces).  Dissolve the cornstarch in cool water and add to the pan.  Cook over med/low heat while stirring until it thickens up.  Add salt, pepper and nutmeg.  Mix in some pasta and enjoy!

Saturday, July 24, 2010

Blueberries: The Continuing Saga


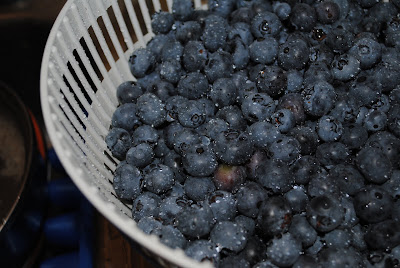
While I waited patiently for the wild blueberries to get a move on and ripen up, the cultivated bushes are gong nuts all over the place around here.  Peak season can often mean discounts for bulk.  We don't want to miss out on things like that, so thanks to my lovely aunt and cousins who watched my children all day while I drove to Tougas Family Farm and picked blueberries for three hours.  I just made the 25 pound discount.  Only just!  It takes s a long time to pick tiny fruit off a bush.

After about 45 minutes or so, the field I was in started to clear out until I was the only person left in that area.  I stood in front of the same 4-6 bushes for the entire time (they were laden with ripe fruit), with no sound but the wind in the pines and the birds over head.  Silence.  Those of you with children may have a hard time understanding me here.  What I mean to say is: there was no sound.  For two full hours.  I'm not sure I've had that experience in a couple of years at best.  It was magnificent.  So much so, that a couple of times I got kind of choked up.  I didn't full on cry, but I came close. 

When I got home it quickly became clear to me that my children could easily eat 25 pounds of blueberries in one sitting. so I took them away. I filled a couple of pints and put them in the fridge for snaking.  I have frozen 12 pounds.  To freeze them I just laid them on a baking sheet lined with parchment  paper in one pound batches (about three cups) and froze them.  After that I put them into mason jars.  I would have probably vacuum sealed them but I was out and it seems a little easier to get at this way, I can take as little or as much as I need.  They do, however take up more space in the freezer this way, so I may have to vacuum seal them later anyway.

I also took 3 pounds and made 4 pints of blueberry juice concentrate (instructions here).  With this I will be able to make refreshing blueberry juice and berry sumacade during the winter.  I am planning to make 12 jars of jam tonight (if I don't choose to go to bed instead) and will dehydrate about four pounds into fruit leathers, which I hope come out better than my strawberry fruit leathers
These 25 pounds will most likely take care of my yearly blueberry needs.  I went back with the kids the next day and we picked for pleasure an even got some peaches.

 We took home about three pounds, which are being turned into pancakes, snack, and dinner. 
Athena Made this lunch herself!
While I was out in the blazing heat picking the cultivated berries, the precious wild berries were ripening.  I made plans with my friend Kerry, fellow mother and earth lady, to meet in the woods behind Target.  She would bring her two boys and I would bring my big girl.  We got up early, grabbed our buckets and our cups on strings (these are to hang around your neck to free up both hands for picking) and tromped into the woods.  The bushes were covered! It was a much better show than the week before.  Athena got right to picking, just as I thought she might.  We hadn't been in the woods 10 minutes before Kerry's little one, James, let out an ear piercing scream.  He had been stung by a bee.  His momma managed to calm him down and he was game to keep picking (and eating) the tiny wild berries.   We got back into our groove and there was another ear piercing scream.  This time from Athena.  It kind of started as a whine and so at first I didn't think she was hurt.  She's four-and-a-half and whining happens a lot around here.  But within seconds, I realized she too had been stung by a bee.  I could see the little guy on her pants.  I pulled the pants away from her leg, but there was still screaming.   I picked her up to carry her to the path and over her shoulder I could see Kerry's horrified look, "She's covered in bees," she said.  Sure enough Athena had a bunch of bees on her pants.  We stripped them off and her poor little legs were covered in at least ten stings.  Luckily I had made toothpaste the night before and had brought some for Kerry to try out.  She ran to the car to get it and I put the baking soda mixture on all the bites. I guess it neutralizes the sting. It seemed to make a difference.  But the bees wouldn't leave her pants alone.  I think she probably got more peach juice on her pants than I had realized before leaving the house.  To make matters worse, they were inside out, so there were bees all up in her pants.  Kerry got a stick and tried to get the bees out, because, you know, she had no pants on, but while the attempt was being made, James got stung again.  Off came his pants.

"Just leave the pants here, I'll get them another time!"  And out we ran, about a third of a cup of blueberries between us and two kids with no pants on. 

Back at the van, while we waited to see if our kids were going to go into anaphylactic shock, I ran into Target to get Athena something to wear.  When I got back and gave her a dress, she was very pleased, and not suffocating.  So all was good.  We relaxed a bit.  The kids ate some pretzels.  I spent my time feeling horrible.  I had led my new friend, her children and my own first born into a bee hive.  Traumatizing children is not part of my wild edibles MO. My revelry of self-loathing was interrupted by yet another ear-piercing scream.  Apparently the bee that had been hanging out on James for the past 20 minutes had decided to sting him. Poor kid! So we made everyone take their clothes off and reinspected them for bees. 

We all calmed down again.  The kids listened to music and the mothers discussed the resilience of children.  We eventually decided to run our errands at Target so we could at least say we got something done.  We walked along the edge of the parking lot, the ripe, plentiful blueberries teasing us all along the way.

"Ain't nothin' in this world is free, baby," they said, "take the bad with the good and come on over."

We (the moms) decided we would find something in Target to occupy our children, and after our errands were run, we would come back out and pick some more.  And so we did, Kerry pulled up her van, parked it sideways and opened the door.  We sandwiched the kids in between the van and the edge of the parking lot.  Armed with a new box of sidewalk chalk we told them to "stay in between these white lines" and went into the woods to pick blueberries.  Really, we were right there, just up a two foot slope.
 Athena and James sitting on the curb, the blueberry forest in the background.  Athena is admiring her "sorry-you-got-stung-by-ten-bees-and-we-had-to-leave-your-pants-in-the-woods" dress
Eventually, they heard the saucy call of the blueberries and came up to join us, picking and eating to their heart's content.  They were not even scarred for life a little bit.  In under an hour we both picked about two cups.  This is really not so bad for wild bushes.  We didn't travel far and could have gotten a lot more with a little more time and a little less kids.  We are working out a way to go back without the little angels. 

I feel like I have passed some sort of initiation.  This is my first utterly ridiculous time collecting wild edibles.

Blueberry Juice Concentrate

I found this great idea here at mother Earth News.  I did it last year with my blackberries, and will be making a lot more this year.  I started with blueberries this year.  The juice concentrate can be turned into a drink any strength you like, from a really sweet juice to something more like fruit water.

It's super easy too!

1.  Thoroughly rinse berries, and place them in a heavy pot with just enough water to make them bob. (I used 3 pounds of blueberries and 4 cups of water) Bring to a slow boil, mash with a potato masher or spoon, bring back to a boil, and remove from the heat. Cool slightly.
 2.  Pour the mashed berries into a jelly bag or a colander lined with several thicknesses of cheesecloth. Collect the juice in a bowl.
3.  Return juice to the pot and sweeten to taste with sugar, honey, or other fruit juices (such as pineapple). I warmed the juice back up a bit to help the sugar melt. Under-sweeten, because you can always add more sugar later, but you can't restore lost tartness. (I used about 1/2 cup of raw sugar) At this point you have a concentrate, which can be diluted with 3 to 4 parts water.
4. Pour it into clean hot jars, leaving half an inch headspace and seal. Or  freeze your concentrate in ice cube trays or small freezer containers.
 5. Process in a water bath canner for 10 minutes. Most berries are naturally acidic, but when canning concentrates from softer fruits like plums, add a teaspoon of lemon or lime juice per cup, just to be safe.

Friday, July 23, 2010

Zucchini Bread, Two Recipes

The Zucchini has landed.  There is a lot of it, and it is taking over my kitchen.  I have made some zucchini pickles (which are really good, by the way), purchased a really neat vegetable peeler that peels veggies into noodles, and made fried zucchini (Joy of Cooking's recipe).  All of that is well and good, but I've also made some zucchini bread!
I found a recipe here, and changed it a bit halving the sugar and using all white whole wheat flour instead of some white and some whole wheat.  I made both recipes side by side to see the difference and mine was better.  Well, it was less sweet and rose higher.
 
Isn't the difference in quality startling!? (Mine is on the left)  That was a joke, I know it's not easy to tell.  If you squint and tilt your head you can see that the one on the left is a little lighter in color, it also had a nicer formed top. 
Then I changed the recipe even more! I replaced the sugar with honey, used some whole oats, and added nuts and fruit.  This bread is suitable for breakfast. I am always trying to make treats that can be eaten any time, like my breakfast cookies

First the traditional:

Ingredients:

1 cup canola oil
3 eggs
1 t. vanilla
1 cup sugar
3 1/2 cups white whole wheat flour (If you can't find this flour, use 2 1/5 cups white and 1 cup whole wheat)
1/2 t. salt
2 t. baking soda
1 t. cinnamon
1/2 t. nutmeg
2 cups grated zucchini
*1-2 cups raisins, nuts, or dairy-free chocolate chips, optional

Preheat oven to 350 degrees.  Grease and flour 2 loaf pans. 

Whisk together all the dry ingredients in a medium bowl. In a large bowl beat together oil, eggs, sugar, and vanilla until light in color. Add dry ingredients to the egg mixture one cup at a time.  The batter will seem like it's not wet enough, this is because the zucchini is giving the bread most of its moisture. Stir in zucchini and optional ingredients. Spread into two loaf pans. Bake one hour or until a toothpick inserted comes out clean.

I've made 8 loaves of this (so far) to freeze.  Yum.

The top is the breakfast bread, the bottom, lighter bread is the recipe above. You can see how much darker the honey makes the bread. This loaf was also a little over cooked.  After I made this I tried the recipe in a 9x13 glass pan, and that was way better. 

Breakfast Bread

Ingredients:

1 cup canola oil
3 eggs
1 t. vanilla
1 cup honey
3 cups white whole wheat flour (If you can't find this flour, use 2 1/5 cups white and 1 cup whole wheat)
1/2 cup whole oats
1/4 cup flax meal (you could leave this out if you don't have any)
1/2 t. salt
2 1/2 t. baking soda
1 t. cinnamon
1/2 t. nutmeg
2 cups grated zucchini
1/2 cup raisins
1/2 cup dried fruit (I used blueberries)
1/2 cup sunflower seeds
1/2 cup chopped walnuts
 whole oats and shredded coconut to sprinkle on top (optional)

Preheat oven to 325 degrees.  Grease and flour a 9x13 baking pan. 

Whisk together all the dry ingredients in a medium bowl. Combine nuts and fruit in a small bowl, set aside. In a large bowl beat together oil, eggs, honey, and vanilla until light in color. Add dry ingredients to the egg mixture one cup at a time.  The batter will seem like it's not wet enough, this is because the zucchini is giving the bread most of its moisture. Stir in zucchini and fruit and nut mixture. Spread into pan. Sprinkle with whole oats and some coconut, if desired. Bake 45 min- one hour or until a toothpick inserted comes out clean.  Honey browns faster than sugar, so the loaf will be a bit darker, but keep and eye on it at the 45 minute mark. If a toothpick comes out mostly clean at 45 minutes, I'd take it out.  The edges may get over cooked and dry if you leave it in.  If you're married to the loaf shape versus the cake shape, try baking it for only 35-40 minutes in the loaf pan instead.

Thursday, July 15, 2010

Zucchinni Pickles and a Lesson in Reading the Directions.

 I just erased a nice chipper paragraph I wrote before I typed in the directions.  The paragraph wondered what the pickles would taste like, and told you how sweet they were. It may have even said something about how pretty they look in the jar, or pointed out the cool vintage labels my aunt found for me.  I erased it because after typing in the directions, I realized I didn't follow them properly and will more than likely have to make them over again.  Bummer.  What I didn't do was get the air bubbles out, which, now that they have risen out, means that there isn't enough liquid to cover the pickles.  I also didn't leave the jars in the hot water for 5 minutes after I took the lid off the canner.  I threw some of the jars in the fridge, If we're lucky we'll be able to eat a few of them before they go bad.  I'm not really even sure what would happen.  I don't think you can get botulism form pickled things, please correct me if I'm wrong about this.  Either way, I'll be too wigged-out come December to actually eat them. They'll get opened and poked at, set on the door of the fridge like we're going to eat them, when people come over we'll say, "Oh yes, those are our zucchini pickles." And eventually, they'll find their way into the compost.  So, I figure they are fine now if they are refrigerated, and we'll just find it in our hearts to eat 10 pints of zucchini pickles before they "go bad" (whatever that means).  So take my lesson and really read through the directions thoroughly before you start.  In fact take another lesson and don't start a a 4-hour canning adventure at 8:30 at night.  Go to sleep if you're too tired to read the directions. 

I got this recipe from Ball Complete Book of Home Preserving.

Zany Zucchini Pickles
14 cups diagonally sliced zucchini
1/2 cup pickling or canning salt
cool water
6 cups white vinegar
4 cups granulated sugar
4 tsp mustard seeds
2 tsp celery seeds
2 tsp ground turmeric

1.  In a glass or stainless steel bowl layer zucchini slices with pickling salt. Cover with cool water and let stand for 2 hours.  Transfer to a colander in a sink and let drain.  Rinse with cool running water and drain thoroughly.

2. In a large stainless steel saucepan, combine vinegar, sugar, and spices.  Bring to a boil over medium-high heat, stirring to dissolve sugar.  Reduce heat and boil gently for 5 minutes, until spices have infused the liquid.  Stir in zucchini. Remove from heat, cover and let stand for 1 hour.

3. Meanwhile get your jars and canner ready.

4.  Return saucepan to medium-high heat and bring zucchini mixture to a boil, stirring occasionally. Reduce heat and boil gently for 5 minutes, until zucchini is heated through.

5. Pack zucchini into hot jars to within a generous 1/2 inch of top of jar.  Ladle hot liquid into jar to cover vegetables, leaving 1/2 inch headspace. Remove air bubbles and adjust headspace, if necessary by adding hot pickling liquid.  Wipe rim.  Center lid on jar. Screw band down until resistance is met, then increase to fingertip tight.

6. Place jars in canner, ensuring they are completely covered with water. Bring to a boil and process for 10 minutes. Remove canner lid.  Wait 5 minutes, then remove jars, cool and store. 

*Also I have added another tag: "Mistakes." We harvest as many of those around here as anything else.  Better me than you!